4 hours.
Finished the roll bar! Booya! I drilled the roll bar to the F-631D angle, after all that measuring from last time. A couple of goofs, but not too bad. First was that I trimmed the radius for the angle bracket a little high. I had to abandon the lower hole in the F774 skin ear where it attaches the skin to the angle bracket, because the 1/8 hole didn’t have the edge distance required. I had to do this on both sides, actually. Kinda bummed me out, but a little filler and you’ll never notice. The other thing I did was drill out the lower forward hole on the right to #19 instead of tapping it to 8-32. Duh. So I’m going to put an AN-509-10R10 bolt through there and lock it down with a stop nut. Everything else is fine. I got my edge distance for the 8-32 screws and the 10-32 screws on the aft section of the roll bar. I also didn’t have to remove much metal to follow the curve of the longeron where the skin lays against the angle bracket.
This is the left bracket bolted in.

And this is the right one. Not that you can tell with me shaking the camera like I’ve got a jackhammer in the other hand.

This is where things got a little odd. The cutout for the roll bar is a little high. Not terribly. And yes, these corners are radiused.

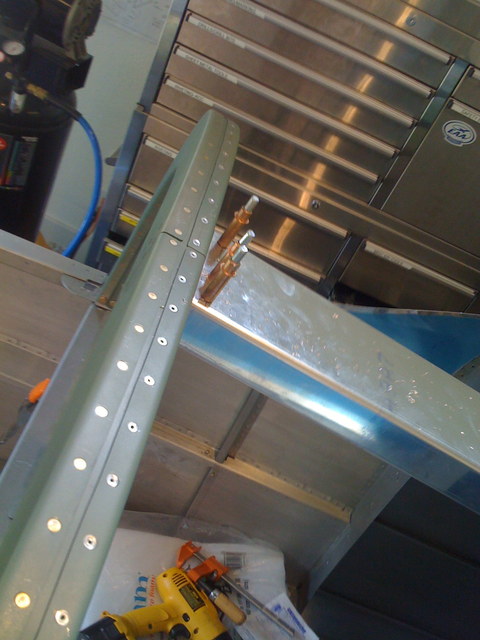
After getting everything drilled in and bolted up, it was time to finally install that support channel thing, and I can’t remember the number of it right now. This gets drilled to an angle on the back of the roll bar, and it connects to the next aft bulkhead. The back half of the canopy plexi goes over this. Others have put baggage compartment lights, in this part, but my interior lighting is going to consist of what’s necessary to see the controls and instruments, and not much else. I think a LED flashlight velcroed under the armrest would make a fine baggage compartment light. I don’t want to wire anything I don’t have to.
This shot just shows the AN3 bolts on the inboard left holding the roll bar to the angle brackets. Oh yeah, I had to trim away a smidge of the seat back stop for the angle bracket to sit flush.

After that, I went on a mad cleaning spree. I rounded up all the loose hardware that had fallen on the floor or in the belly of the plane and returned all the tools to their proper places. I vacuumed 2 weeks’ worth of metal chips off the floor and a load of aluminum dust off the grinder/saw bench. Then I vacuumed out the plane,
Clean shop:

Clean ship:

After that, I tied up some loose ends. The forward-most bulkhead in the tailcone comes from QB-land with pop-rivets installed in the joint between the two bulkhead halves. I guess this is for better skin fit or whatever. Plus, the plans tell you to leave the bottom hole open if you’re building a sliding canopy. Well, I’m not building a slider. So I was able to get those done.

The other thing I got done today was something I should have taken care of when I put the control column together, but for some reason, I blew it off. I drilled the hole in the control column for the right-side stick. There’s a bolt through there, but it’s not going anywhere without horking on it with something that’ll chip the powder coat, and besides, I don’t see the point of taking the right side stick out anyhow. Maybe if shelley decides she doesn’t want the thing in her lap while she knits on long XC flights, then I’ll revisit it, but for now it’s there.

The last loose end I took care of was the rest of my finish kit inventory. I still have to do all the little bags, but I got everything checked off the list. This is most of my finish kit, occupying the guest house bedroom.

Finished Roll Bar and other stuff.
< NO TAGS >
Comments (0)