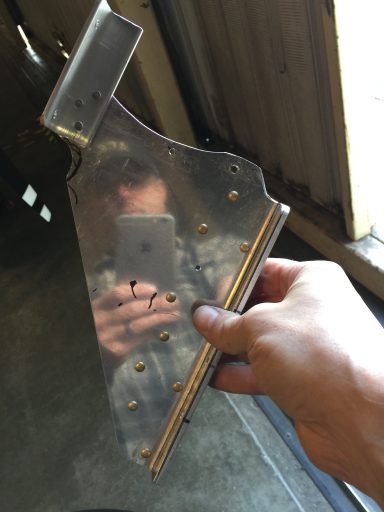
Today sucked a lot less than yesterday. I got the oil cooler attached to the engine mount, which is a significant milestone. I also learned that you can attach anything at any angle using this One Weird Trick, which I’ll describe later.
The oil cooler itself doesn’t weigh all that much, and there are no significant loads placed on it. The attachment method is Adel clamps, which serve to isolate it from some of the engine’s vibration. Given that, it seems that the beef I put into the brackets is unnecessary and an example of overengineering. That said, it’s really, really important to me that the oil cooler stays firmly attached and that it retains its structural integrity until the end of time.

Forward Bracket – Oil Cooler
The Weird Trick I mentioned earlier is shown below. On the right of frame, there is a large-ish piece of angle connected to another angle bolted to the cooler. The way this works is that there’s enough span on the opposite side to cover the distance needed by two Adel clamps when the angle is laid up alongside the tube and the adjacent side lines up with the angle connected to the cooler. This made for a much easier test-fitting, and the same technique is in use on the bracket shown above.

So it’s come to this. The oil cooler is suspended where it needs to be to get air to it from the big hole in the baffle. At this point, the whole setup will take nearly my full weight, so I’m not terribly concerned about the parts failing. At this point, the weakest parts are the flanges of the oil cooler itself, and they can be reinforced with angle or bent sheet.

This is the best fit possible for access, airflow, clearance from other important things (fuel line, for example). There should also be enough room to get a fiberglass intake plenum between the cooler and the middle engine mount tube. I measured. But “best fit” means the least hideous compromise. Now for shaping the plenum. Yay, fiberglass.
Happy New Year.
Comments (0)