« Posts tagged cowl

Oil Cooler – Day 5. Progress.

Today sucked a lot less than yesterday.  I got the oil cooler attached to the engine mount, which is a significant milestone.  I also learned that you can attach anything at any angle using this One Weird Trick, which I’ll describe later.

The oil cooler itself doesn’t weigh all that much, and there are no significant loads placed on it.  The attachment method is Adel clamps, which serve to isolate it from some of the engine’s vibration.  Given that, it seems that the beef I put into the brackets is unnecessary and an example of overengineering.  That said, it’s really, really important to me that the oil cooler stays firmly attached and that it retains its structural integrity until the end of time.

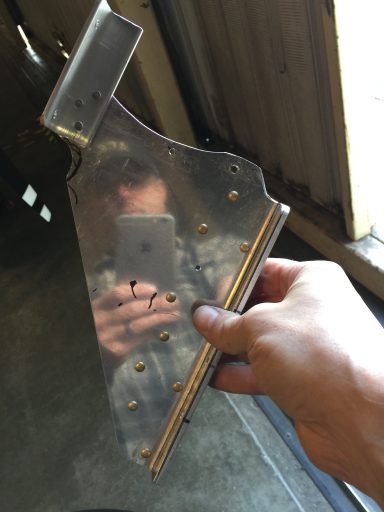
Forward Bracket - Oil Cooler

Forward Bracket – Oil Cooler

The  Weird Trick I mentioned earlier is shown below.  On the right of frame, there is a large-ish piece of angle connected to another angle bolted to the cooler.  The way this works is that there’s enough span on the opposite side to cover the distance needed  by two Adel clamps when the angle is laid up alongside the tube and the adjacent side lines up with the angle connected to the cooler.  This made for a much easier test-fitting, and the same technique is in use on the bracket shown above.

So it’s come to this.  The oil cooler is suspended where it needs to be to get air to it from the big hole in the baffle. At this point, the whole setup will take nearly my full weight, so I’m not terribly concerned about the parts failing.  At this point, the weakest parts are the flanges of the oil cooler itself, and they can be reinforced with angle or bent sheet.

This is the best fit possible for access, airflow, clearance from other important things (fuel line, for example).  There should also be enough room to get a  fiberglass intake plenum between the cooler and the middle engine mount tube.  I measured.  But “best fit” means the least hideous compromise.   Now for shaping the  plenum.  Yay, fiberglass.

Happy New Year.

Back to Project Status

IMG_19596 hours.

About 10 hours into Phase 1 testing, and so, time for the first oil change, among other things. Have I mentioned I love flying this airplane?   I’ve been flying all week and not blogging much, because I’ve been learning the airplane, how it flies, how it feels.  I can report with great accuracy that gyroscopic precession is a bitch:   If you try to lift the tail too fast, the aircraft will quickly be pointing at whatever is to the left of you.

I’m updating and rearranging the order of things in my checklists, based on where the task is spatially in the cockpit.   This is just good UX design, but like anything else, you work out the best workflows through usage.   For instance:  Put the flaps up before takeoff.   Yes, I know, this should be a post-landing task, and it usually is, but it doesn’t hurt to have it on the runup checklist before RPM to 1700.

The autopilot is more or less dialed in, but it still jitters a little bit.  This is unsettling and needs fixing, but that can happen later.  At least now it doesn’t pull a divergent oscillation in bank.   My fuel flow fix works as well.  I’m now reporting a burn rate consistent with what I expect for a given RPM or MAP.

Day before yesterday, I took a flight to Santa Paula to get fuel and spent a little time buzzing around the Ojai valley.  That’s where the above pic is from.   But following that flight, I decided to take a run at tweaking the idle, which is still al little rough down in the 750’s.  Last time I messed with it, I set it richer to cure the somewhat terrifying issue of it stumbling when advancing from idle to high RPM.   I think I went too far in that direction because since then, it’s run rough at idle and has been a bastard to start when hot.    The hot start is a known issue with FI engines, but even with the proper procedure, it’s difficult, so an adjustment had to be made.   This took the better part of an hour and a half, and the engine has to be hot when the adjustments are made.   This is why I have a nice burn on my hand from trying to get a wrench into the space where the idle adjustment arm is.   I’m still not ballsy enough to adjust this thing with the engine running.  That’s just not going to happen, especially when the exhaust pipes are still hot.   It’s amazing how fast ss exhaust pipes cool, but you don’t want to have a forearm laying on one when they’ve got hot gas blowing through them.

I was going to go fly again, but the wind put the kibosh on that idea:  14kts gusting to 20kts, although right down the runway.  I was too chicken to try to fly that, although I could have probably done wheel landings and i’d have been OK.  Better safe than filling out FAA forms over the wreckage of a balled-up airplane and a bunch of broken runway signage.

But yesterday saw the return of 313TD from aircraft to project.   David and I did the cutting and measuring of the wheel pants and gear fairings.  This is way more difficult than it has to be: You have to take the weight off the gear so you can align the wheel pants and gear fairings in trail.   Fortunately, the local airport mafia purchased a surplus forklift for a couple hundred bucks, and doubly fortunate, Dave knows how to drive one!

IMG_1960

I didn’t snap a lot of pics during the actual process because we got busy and stayed busy.   We first jacked up the plane on each side to install the wheel pant brackets, and took the opportunity to bevel the brake pads in an attempt to stop them from groaning during taxi.    Then we used the forklift to lift the airplane by the motor mount just high enough to get the weight off the wheels and the bend out of the gear legs.   Then there was a lot of crawling, measuring, and marking to find the centerline of the wheel parallel to the centerline of the aircraft.   We drilled the aft section to the gear brackets once we had everything lined up.

IMG_1962

It’s amazing how hard it is to find a 1″ block of wood in an airplane hangar, but 3/4″ PVC, no problem.  Short sections of that were used as spacers on the vertical to give the 1″ clearance required for the wheel pant.

Then we did the loop-of-string method to insure the gear leg fairings were in trail.   No drilling done there, but marking the position on the gear legs got us what we needed.

This whole process required making as much space in the hangar as possible, so we had to shove the Luscombe outside and move a bunch of stuff around to accommodate the forklift’s dance moves.

IMG_1961

The yellow chocks are where the forklift wound up to put the tine with a hole in it directly above the engine mount.

Of course, all this means that the aircraft is down until the fairings can be installed.    This is necessary anyway because I need to do an oil and filter change and a thorough under-cowl inspection.   Fortunately I can do some of the fairing work at home, like paint.   But what’s left is the onerous, fiddly part: glassing in the intersection fairings, then trimming and priming the pieces.   When that’s done, I should be able to bolt it back together and go flying some more.
Cowl surfacing, part 2.

6 hours.

Before I knew anything about fiberglass, I figured the pepto-pink Van’s cowl was pretty much the norm. It’s not. The Van’s cowl is shite. You’re supposed to fill in all the pinholes (and the whole thing is mostly pinholes) by rolling on straight epoxy, then squeegeeing it off. 3 coats go on like that and theoretically, the pinholes are filled in.

The reality is far from theory. What I’ll have to do now, if I want this thing to be even remotely smooth, is to squidge on a layer of micro slurry. Not the paste used for building up a shape, but enough to fill in all the divots. Once that’s done, I’ll be able to sand it smooth, then seal it with another layer of resin.

Or, I could take it to a body shop and have them do it. I need to be very careful not to bust the 51% rule, though, since I got the quickbuild kit to start with.

So the third coat of resin is curing right now, and should be ready for sanding tomorrow.

Since I was in fiberglass mode, I finished the cutout I had to make in the snorkel to allow it to clear the alternator. This is also curing, and should be done enough to permanently install tomorrow.

Aside from that, I reworked the fuel feed line so it makes a little more sense and doesn’t bend at such an extreme angle on the input.

More fiberglass fun – Cowl and baffles.

4 hours.

Not a complete balls-up, no, but close enough. Yesterday I finished the lower cowl inlet baffles. Almost. I still need to cut away some extra airseal that blocks a portion of the snorkel intake, but other than that, I’m done with airseal. I hope. That’s the good news.

The not so good news is that I decided to move on to filling the pinholes in the pepto-pink lower cowl. Of course I cocked it up, because I failed to remember one simple thing: The resin mix is supposed to be applied to the surface with a squeegee, not just slathered on with a brush. I should also have cleaned the surface with acetone, then soap and water before applying. So now I get to sand off a bunch of resin and redo it. Fortunately, I didn’t do the whole thing, just the front third, but it’s still a pain and a lesson in attending to detail.

Since that was going to have to wait for another solid block of time, I decided to finish the heat muff install. When I received the heat muff, one of the lock nuts on the through-rods didn’t have threads in it. I got some replacements from the manufacturer, and that is now installed. I also cut and attached the SCAT tubing to the muff, the heater box, and the baffle vent. OK, that last part still needs to have the hose clamp tightened, but it’s pretty much done.

Cowl and foam

4 hours.

Yesterday I glued the sub-ramp I made the day before to the cowl. Today, I shot my marine foam into the space underneath the ramps in preparation for glassing in the sides and blocking travel of high pressure air through the spaces underneath the ramps to the low-pressure area to the sides and below the baffles.

I may have used too much foam. It just keeps growing.

Tomorrow I’ll carve out the excess foam and glass in the tunnels.

I also took a crack at filling the area around the oil door. This might turn out badly, but it’s just resin and micro, so I can always sand it off and start over.

Cowling ramps

2 hours.

This is two hours of puttering over the last several days. I go the cowl ramps glued on, and tonight I made the contoured part that interfaces with the governor baffle. Next is to fill the cavities under the ramps with boat foam, shape them, then glass them over.

Gluing the ramps on turned out to be more or less a non-issue, but I did have to take the front baffles off, which is a PITA.

I got my ignition harness back from Bill’s Air Center. That was only $80 worth of stupid, so I consider myself lucky. Oh, I didn’t tell you about that? OK. I was pulling on the wire end of one of the starboard plug wires at the harness cap, for some reason, and it slid out of the casing. Plug wires work like a Chinese finger trap. The outer shield expands or contracts depending on where the tension is, so it allowed a bit of wire to slide out of the casing. One thing led to another, bad went to worse, and the next thing I know, the whole wire is in its separate components on my bench.

After a frustrating couple of minutes, I resigned myself to taking it up to Bill’s Air Center at SMO. Bill’s a great guy and he’s been there forever. They fixed it, but said it was a major headache to source all the parts, since Skytronics doesn’t actually sell them. They want you to send your harness back to them for repair. Phoo on that. Anyway, it’s all better now.

Baffles 13

5 hours.

Lucky 13. This baffles thing is second to none the worst, most vexing part of this build yet.  However, I did make a lot of progress this weekend. I got the airseal material trimmed, for the most part, although I suspect I’ll have to iterate the left front a bit, the part that goes around the governor. This is no end of head-scratching and puzzlement. Today I was actually able to drill the airseal material to the baffle sides, which is a big step, and with the exception of what I just mentioned about the front governor, the top cowl seems to seal all the way around, which is a good thing. Never having built an airplane before, it’s hard to tell if I’m overthinking a problem. The key is to keep focused on the end result desired, and solutions will appear. On this particular task, they take their sweet time doing so, and this is the one task on this build where I’m not able to stand back and go “yeah, that’s awesome.” Instead, it’s something to be gotten through, like a prostate exam or tax forms.

I’ll post as much of a photo story as I can in a later entry, but I didn’t take a whole lot, and part of the reason for that is that it’s really difficult to see anything inside the cowl with all the parts installed, let alone jam a camera up in there and shoot comprehensible pictures.

There are also a number of things that need to get finished before this can be called “done” so I’ll list them here and hope to get at them this week.

The pain in iteration comes from having to put on and take off the baffles. This is a time consuming process, and needs to happen several times before all the finishing touches can be done, but it’s not a good idea to install things permanently because depending on various factors they’ll just have to come off again. So here’s a list of unfinished business, in no particular order:

  • Make tab for left front lower ramp to close off gap near engine case.
  • Drill rear bracket to rear baffle
  • Make/install fasteners for front/rear side baffles
  • Drill ducts for alternator and magnetos
  • Drill/install spark plug wire grommets
  • Proseal corners of snorkel at the filter bracket
  • Finish making front left baffle seal sections
  • Trim cowl for lower left inlet ramp
  • Rivet oil cooler reinforcing bracket to baffles
  • Drill/install oil cooler doubler and bracket
  • Deburr baffle seal rivet holes
  • Pop-rivet baffle seals to baffle metal
  • Glue/fiberglass top cowl inlet ramps/seal inlet ramp sides, shape ramp interface
  • Permanently install prop governor, gasket and all
  • Recut governor/front left seal material
  • Make/install lower cowl inlet seals

It’s endless, I’m telling you.  But with this out of the way, it’s time for plumbing, wiring, and control cables.  When that’s done, I’ll rivet the top skin on, put the canopy back on, and finish the interior.  After that, it’s time to go to the airport!

Baffles 12

7 hours.

If I had a time machine, I wouldn’t go back and tell 1984-me about all the cool stuff in the future, or bet on all the baseball games, or ram a pickup truck into a sleeping Mohammed Atta. OK, maybe I’d do that. But what I’d definitely do is tell 2005-me that under no circumstances should you purchase an engine off eBay, and if you do, make sure the damn prop governor is in the back.

I’ve spent more time than I care to think about figuring out just how the hell the cowl intakes are supposed to interface with the baffles via the rubber airseal material. There are no guidelines for this, here there be monsters, etc. The io-390.com site has a lot of good information, but as with all things cowl and baffle, everybody’s setup is just a little bit different, and I’m basically having to roll my own solution anyway. This is not necessarily a bad thing. I just wish I knew a lot more of what I know now back before I started.

The major issue comes from figuring out the shape of the airseal on the front baffle on the left side, the one that wraps around the prop governor. I think I have something that works, but I’m not 100% happy with it, and I wish I knew how to do it better. But it looks like what I’ve done will seal the high-pressure area under the cowl, and when I get back from Toronto, I should be able to finish cutting the airseal strips for the rest of the baffles. I should also be able to bond the inlet ramps to the top cowl and start filling in the tunnels on either side of them. The idea is to keep air from spilling out of the high pressure area into the area below the engine. The pressure differential is what cools the engine.

If I didn’t have this stupid front-mounted governor, the standard baffle kit would fit fine and I would probably be on to plumbing and wiring by now.

Baffles 11

6 hours.

Quick update: Baffles trimmed, front baffle bracket fabbed, top inlet ramp trimmed,

Pondering airseal fit. I just don’t friggin’ get it.

Baffles infinity.

7 hours.

Memorial day weekend was decent. Got a bunch of stuff done, mostly trimming down the baffles. The final trimming still isn’t done, but I got the contour of the top inlet duct cut in. Very iterative, time-consuming process. I have to say, I’m still not altogether clear on how the airseal is supposed to work around the cowl inlets. There’s some airseal that’s supposed to go on the bottom inlet half, and I guess that’s supposed to overlap with the stuff on the baffle somehow.

the other problem I have is just how little metal I’ve got on the front baffle at the top of the arc near the governor drive gear. Still, that has to be fastened to the engine somehow, and I suppose I can reinforce it when I devise some clever system for attaching it to the engine.

I also drilled the fiberglass inlet ducts into place. Now that I have them locked in, I can glass them and fill in the inboard side so air doesn’t blow through and cost me pressure.

Apparently this game is all about air pressure, specifically, making sure that air flows through the engine compartment the way it’s supposed to, which is over and between the cylinders. I read somewhere that gaps totaling up 1 square inch where they’re not supposed to be will cost 20% of the cooling capacity. This would not be good. At all.

First thing that has to happen though is the baffles have to come off, get final trimmed, and deburred. Maybe painted. Not sure about that.

I’m starting to see one of two things: Either it’s the light at the end of the baffle tunnel, or it’s a train, which means I’ll wind up redoing them.