« Posts tagged hoses

[Untitled]

5 hours.

Today was about putting things back together and getting a handle on some of the chaos.   The first bit of good news is that the oil temperature probe works fine.  I pulled it out of the engine and hit it with a heat gun and sure enough, it gave me a reading.  So I’m not going to worry about that anymore.   I secured the wires back in their bundle and i’m calling that squawk done.

I also wasn’t real happy about the weird way I had the fuel pressure sensor set up.  The Adel clamp holding it was maybe a size bigger than it should have been, and this way seems more secure:

IMG_1572

As I mentioned last time, I flipped the governor arm over and it seems to work just fine:

IMG_1570

My biggest problem with doing it this way was where the injector line was going to go.   A piece of angle solved that.   Now it’s out of the way, and less likely to be heat-soaked down near the cylinder.  I still haven’t safety-wired the screws yet, or put the cotter pin in the cable attach nut, But I think this is how it’ll stay.

Last week, Owen recommended tightening up the tailwheel chains.   Van’s recommends a half an inch of slack, but if you ask ten different people how they like their tailwheel chains, and you’ll get at least five different answers. But my chains had an inch of slack, and if I took a link out, I’d have none.  But I did take a link out of each side, and while there isn’t really any dangling slack, I can move the chains up and down by about a half an inch, and I’ll tell you, based on today’s test, it taxis just fine:

IMG_1571

That little gap in the rudder fairing is kind of annoying.   Not exactly sure what to do there, except put nutplates in there and hope for the best.

Today’s test was all about seeing how things went with the cowl on.  First, I wanted to make sure I could actually get the cowl on with the flipped-over governor bracket making the cable rise a bit more than it did before.   Turns out, I’ve got about 1/8″ of clearance between the cable and the top cowl, which is good enough.   And from what I remember, the cowl inflates a little in flight, so that 1/8″ becomes a little more.   And that’s fine.   I just don’t want to have to put a clearance wart in the cowl to accommodate the cable.

IMG_1573

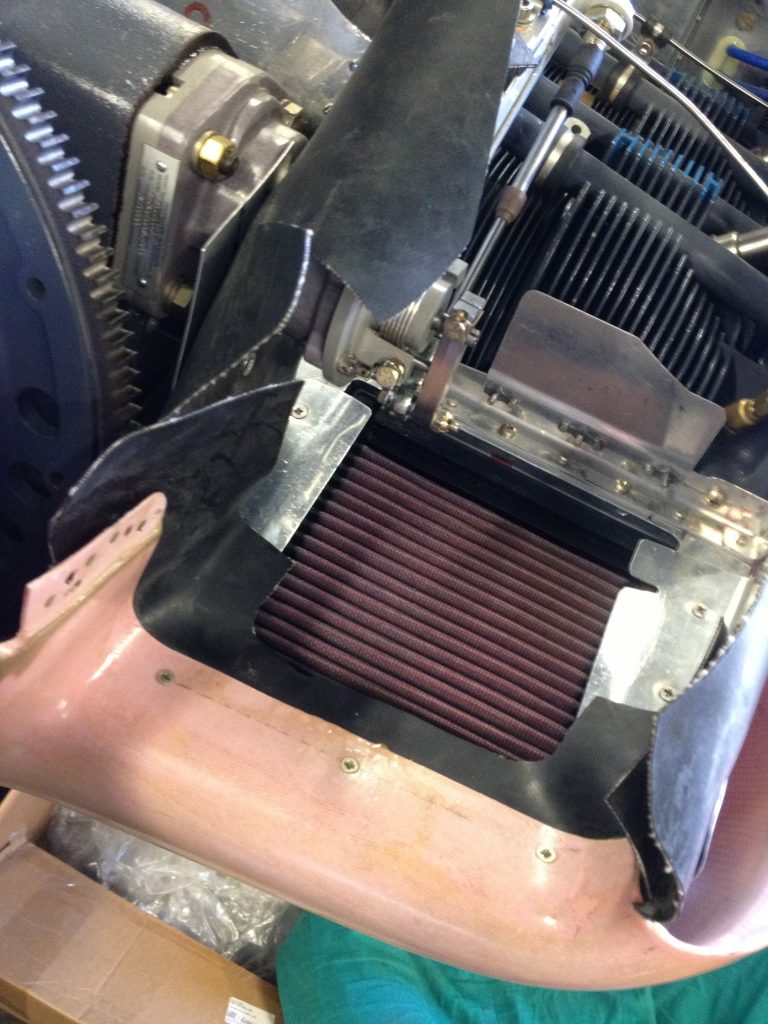
But before taking it out for another test, this adjustment had to be made to the baffle material on the lower cowl.  I had to cut it back a bit, because it was covering up about 6 square inches of air intake.   Bad.   So with this mod in place, I put the top cowl on, and pinned it down.   Then I put a few of the floor panels in, and you’d be surprised how much the plane stiffens up with the reinforcing action of the panels.   I ran it up, then shut down the left mag.  Engine died.   Started it again, repeated.   OK, right mag dead.   Grr.   Still runs fine on one though.

So I said screw it, let’s taxi it around.  The new tailwheel chain tension was much better.  Now it’s more like Mickey’s Citabria, and the ground handling is nice!  I took it to the end of the hangar row, turned right, went down the next row, turned right again, then went back to the barn.  CHT’s never got above 210.   As soon as I get this mag situation sorted out, it’s time for ground runs.

\Last time, shutting off the left Mag made a lot of popping and missing, which I attributed to timing.   This time, I’m pretty sure the timing’s right, but now shutting off the right mag shuts off the engine.  Now, it might have something to do with the fact that I left the pop-rivet I was using for a timing pin in the hole when I pulled the prop through, but I can’t say for sure.   What I do know is that before, on the right mag, I had backfiring.   Now I’ve got squat.


Adel clamps, and lots of them.

5 hours.

Today was another iteration of finding the best way to keep things from rubbing together. I did a lot of hemming and hawing about zip ties, reading the horror stories on the Internet of that one guy who had a zip tie saw through his engine mount, and that you’re never supposed to use them on the engine mount or hard lines, and that’s all fine. Supposedly they’re big time savers, and for wiring, you bet. Lacing cord? No way, I don’t have the patience or the skill and zip ties are easy. Firewall forward though, it’s a different story. Conditions are murderous up there, and the regular Home Depot 500-for-$10 pack ones will go brittle and snap off in the heat and vibration of the engine bay. Still, there are a lot of folks who use zip ties up front with no ill effects, and there are all kinds of cool tricks to make standoffs, joins, and other fastenings, but you need to use a tie gun, and my tie gun is shite. I think I bought it at Fry’s for around five bucks, and it shows. I’m not shelling out three figures for a Panduit tie gun though, that’s just crazy. What I did do instead, is finally master the horror of Adel clamps.

Take a look:

That’s the neat little visegrip hack I bought a while ago, but never quite got the hang of. Now I’ve got the hang of it. The way this thing works is you jam a pointy thing that looks like an icepick through the holes on both the Adel clamps you’re trying to put together. Then you try to get the flanges close enough so you can wrap the forks of this gizmo around the icepick, then squeeze the clamps together as if they had a bolt throug them. You pull the icepick out, and you can put a real bolt through the holes. Problem is, the forks on the visegrip thing are pretty thick, so I ground off a couple of 32nds from each side. This way I could use a shorter bolt and not as many washers. At this point, screw it, washers are cheap and I’m not using more than 3 on a side, so this setup works fine.

I did as much as I could on the right side of the engine, where the 1 and 3 cylinders are. This means the alternator wire, the fuel pump input line, the purge return line, and the oil pressure sensor line, along with some miscellaneous wiring, needed to be isolated from the airframe, the engine, and each other.

Above my head, you can see the throttle and mixture cables, as well as my homemade steel brackets, and on the left, the double Adel-clamp assembly keeping the starter wire from rubbing on the mount.

I didn’t take a lot of pics, because I was too busy fiddling with clamps, and that makes my hands hurt, especially the knuckle on the middle finger of my right hand, where that stupid cow knocked me off my motorcycle with the door of her minivan this summer. I did get some, like this one:

This is the purge line, all secured and isolated.

This one:

shows the fuel pump feed and the purge return, held off from each other and the mount. Also clamped up here is the alternator wire and starter wire.


Gratuitous Adel clamp porn of the alternator wire.

Gonna do the rest of it this week. Happy new year!

Cables, hoses, pipes

6 hours.

For a “simple” engine this thing sure has a lot of frippery. Today was spent optimizing the routing of various members and employing different methods to insure they don’t chafe on each other, or the multitude of hazards awaiting the unsuspecting flammable-liquid-carrying hose beneath the cowl. Oh, and heat. There’s lots of heat down there. The control cables, I wrapped in some Thermo Tape I bought a while back for that very purpose. I think I’ll also use the heat shields that clamp onto the exhaust pipes as well, but I’ll do those later.

I actually wound up dropping the exhaust so I could get better access to things that needed to be secured. I’m also debating hooking up a fuel pressure sensor, since thanks to an error in my PHT hoses order, I now have a firesleeved hose that will work great as an oil pressure line.

I also spent a good chunk of time chasing down the intercylinder baffles for my engine. There are about three or four different variants, some with the hole drilled for the fuel injection hose, some without. I finally wound up just ordering the ones the book calls out for that engine, and I’ll drill the hole for the injector feed line later.