« Posts under Firewall Forward

Cowl Fitting 2.

6 hours.

First thing was finishing up drilling the top cowl hinges, then it was on to the cowl itself.

I finished measuring the line 2″ back from the firewall all the way around the fuselage. My original plan was to just mark the ends of the lines with red electrical tape, which you can see in this photo, but after some thought, it turned out to be a stupid idea. Electrical tape flexes like crazy, and a closer examination from a different angle showed the tape line to be wavier than an acidhead’s dorm room. What I did have was a flexible plastic ruler, which allowed me to mark the ends of the 2″ lines all the way around and still conform to the shape of the fuselage. Once I had a good line, I laid the edge of the red tape on it, which gave me a tactile cue for measuring back onto the cowl itself. 2″ back from the red tape is where the edge of the firewall is, so that got marked on the cowl, and the same process repeated, but this time with masking tape. Masking tape flexes less, and doesn’t seem to bother the fiberglass cutter on the Dremel too much.


Here’s the Pepto-pink cowl with the tape line marked, ready to have the extra bit trimmed off the end. I had to clamp a couple of blocks to the bench to keep it from jumping around, but once that was set up, I cut off the overhang on the cowl. There wasn’t much. With 1/4″ of clearance between the spinner and the front of the cowl, there was just about that much overhang from the cowl aft of the firewall edge. Once the cowl was marked, I put the hinges back on


This is right after trimming off the excess. What followed this was a lot of iterations of sanding and shaping, trying to keep the 1/4″ of clearance up front, but maintain a nice even 1/32 gap all along the cowl edge. You leave this gap for paint. If you don’t, when you put the parts back toghether, the thickness of the paint makes them not fit anymore, and the paint gets chipped, and nobody wants that.


The 1/4″ gap up front is pretty important. The engine is on rubber mounts, so it’s going to flex a little when it starts and shuts down, so you want to keep the spinner clear of the cowl. In this shot, it’s still a little high, I want to have the spinner about 1/16″ to 1/8″ above the cowl to account for when the engine sags after the first few hours of flight. I guess the rubber mounts do this. Go fig.

Apparently, the pink cowl is thinner than the old green cowl Van’s used to provide. The plans have you putting .032 shims between the hinges and the firewall because the old cowl used to stick up significantly. The pink one, or at least this one, required no shims at all. It’s either flush with the top deck skin or just slightly above it, just enough to catch a fingernail on. That can be sanded flush without thinning the material significantly.

All in all, a non-suck day.

Cowl fitting 1

1.5 hours

Took a crack at the top cowl hinges. Didn’t turn out too bad, either. The hinges that attach the cowl are beefy 1/8 hinge, but they follow the contours of the firewall, so you have to replace the 1/8″ aluminum hinge pin with the .090 stainless pin that Van’s supplies. Makes getting them into the eyes with your arm jammed in the oil door easier, supposedly.


Left side drilled.

I also found another neat trick on the Interwebs. Walter Tondu’s RV-7A site shows how to align the cowl to the spinner using a couple of quick-grip clamps. Much easier than some of the methods I’ve seen out there.

I got the right side clecoed on, but not drilled yet. Maybe I’ll tackle that in the morning.


Right side

I also filled out the spec sheet for my PCU500x governor. Good thing I ordered the Van’s bracket. I think I still have the old Cessna bracket around somewhere, but I doubt it will be of much use. If the Van’s bracket doesn’t work, I’m going to have some fun making up a new one. From steel, no less.

Prop and cowl.

4 hours.

Prior to any fun stuff with the prop, I clecoed on the forward top skin. I did put clecoes in from upside-down along the front in a couple of places, But I think I’m going to take them out, because as somebody on VAF wrote, you’re trying to match the cowl to the skin, not the firewall flange.

So, remember that fancy purple custom spinner on my prop?  Turns out there isn’t a really good way to mock that up, short of scoring a junk Hartzell C2YR or C2YK rear hub half.  Here’s why:

The stock spinner is  a flat disc that can be mounted to the prop flange with six bolts, at the end of 2 1/4″ spacers.   This one mounts to the back of the prop hub using a 7/8″ spacer between it and the hub, to get it clear of the hub itself.   No place to attach bolts for the prop flange.


Here it is again from the side.


Measured from the back of the prop flange, It’s a little under the 2 1/4″ spacer length called for in the factory setup.

So a command decision was made to just hang the prop on the engine and fit the cowl based on the real deal instead of the mockup. This is acceptable, lots of guys have done it to no ill effect, other than it being an obstacle in the shop. However, with the blades set to vertical, it’s not in the way all that much. Initially I was going to see if David could help me hang the prop, but then I remembered, hey… I have an engine hoist. The installation guide in the prop manual recommends using a sling to position the prop anyway, so the hoist got yet another use.

I wrapped some blue masking tape around the blade roots to protect them from the straps, enhancing the plastic wrapping the prop shop put on the blades when I had it resealed a few months ago.   This gave me a pretty decent setup to get the prop hub flange lined up to the crankshaft flange.


This is where it got interesting.    The actual installation has you putting six studs in the prop flange, torquing them, then installing the prop to those via castle nuts with spring pins through them.   I don’t have that option.  You can see from the top pic that my prop came with the studs, castle nuts, and spring pins installed already, so the process became this:

Get the prop lined up as nicely as possible
Get all the studs started
Keep hand-turning each one a couple of turns until after an eon, the prop seats on the crankshaft flange.

This took a while, and they’re not torqued down at all. The whole point of this is to fit the cowl.


The top half of the pepto-pink cowl came down from the rafters to be sat atop the engine (from which I had previously removed the baffles in their current state), and I have to tell you, the pink/metallic purple combination is striking and eye-catching, in the worst way possible.

Next is

Baffles 3.

7 hours.

Spent a good portion of the day iterating the front inboard baffles. This is where it gets weird: I used the IO-540 baffles from the RV-10 kit as a template to modify the baffles that came with my kit. Pretty straightforward, except that the hole for the governor is going to be very interesting.

baffles_front
The process here was pretty simple: Trace the outline of the 540 baffles onto the 360 baffles supplied with the kit, then cut away the excess. The 540 baffles sit a little farther back on the engine, behind the bulge for the governor drive gear and governor pad. I had already spent a good bit of time yesterday trimming the left front baffle to fit using more or less the same method, except I screwed it up a little. I didn’t leave any metal crossing over the centerline of the engine to link the two halves up. No big deal, that’s what spare .032 and platenuts are for.

Since the right baffle sits a little bit more aft, I needed to cut down the bottom of it about 7/8″ and cut the forward part straight back. It turned out OK, but left about 1/2″ of difference at the top from the left side. This is not problematic either, really, since a good chunk of that material has to be removed for the cowl fitting.

baffles_front2
I’ll also have to extend the sides out to just past the ring gear on the flywheel, since the front baffles are now mounted too far aft.

I got my replacement #4 cylinder baffle parts, so I worked on those for a while. I”m not going to tackle the oil cooler until I’ve trimmed the baffles down for cowl fitting.

Speaking of which, that happens next. I have to get the spinner off the prop, make some 2 1/2″ spacers, and get my spinner put on the engine so I can line up the cowl. We’re about to head back into fiberglass land, folks. Yay! The entire world will be covered in pink dust. Like a Chtorran invasion site.

Baffles again.

1.5 hours.

The front baffles from the O-360 kit don’t fit at all. No surprise there, the front of my engine is more like the six-cylinder O-540 that goes on the RV-10, the Harmon Rocket II, and which a couple of gnarly dudes have shoehorned into an RV-7 like mine.


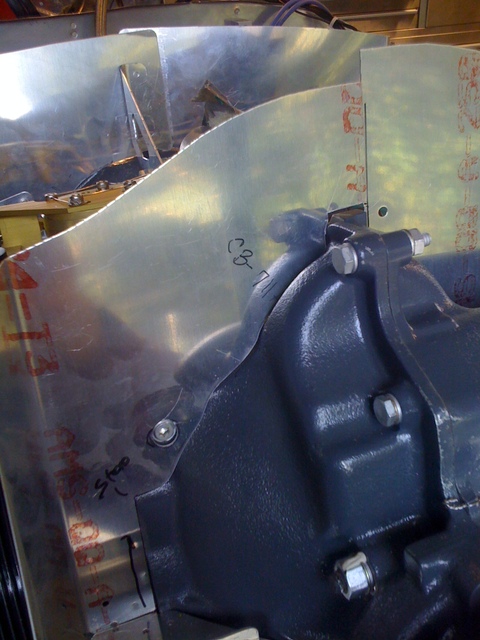
This is the problem. This big piece of meat right behind the flywheel (the toothy thing on the left) is where the governor mounts. Putting the front baffles between this and the flywheel didn’t give me nearly enough clearance between the baffle and the flywheel to make me happy, so I’m glad I ordered the front baffles from the O-540 kit from Van’s.


Here’s another shot. The floor baffle needed a good chunk trimmed away to accommodate that big flat boss below the governor pad. I have no idea what that is, other than a place to mount an air conditioning compressor, and that’s so not going to happen. I read the TCDS’s on this engine today and this fat little bastard weighs in at roughly 40lbs more than its conventional cousins, so I’m not about to start bolting on more heavy things up front.


The right baffle went on OK with some trimming, but it’s a no go: It puts the line of the baffle wall right down the centerline of the governor, which necessitates the O-540 baffle for that side too. The io-390 guys all had to make new ones, which I might do, but I can use the pattern of the 540 baffles to help out with that, and there are also pdf’s on the io-390.com site.

So that’s where it’s at. The #1 and #3 side baffles are done, but I have to put the supports on the floor baffles. Then, when my new parts come in, I can finish the rough install before fitting the cowling and trimming all the baffles to final shape.

More baffles.

7 hours.

Apparently, 7 hours is enough time to royally screw up a cylinder baffle. Case in point:

The #4 cylinder baffle holds the oil cooler on the aft section of the baffle. The way this is supposed to work is that the baffle is made largely of 4 pieces: There’s the part that connects to the #4 cylinder head, the part that holds the oil cooler, the part that covers the inboard part of the crankcase, and the stiffener that holds parts 1 and 2 together and gives it some beef so the oil cooler doesn’t rip the baffle apart in all the vibration. The plans call out a distance of 3/8″ from the outboard edge of the baffle where it joins parts 1 and 2. Fun fact: If you stick to this dimension, you don’t get enough room between the drill-through holes of the oil cooler doubler and the angle on part 1, which means you can’t install platenuts. Part 4 has pre-drilled holes which supposedly line up with the holes in the oil cooler doubler. The plans then say “keep the oil cooler as high as possible for maximum efficiency.” Well, that’s neat and all, but if you do that, you get out of alignment with the predrilled holes, and everything’s a mess.

Another important safety tip is to leave cutting out the big rectangular hole for the oil cooler airflow until AFTER the whole mess is drilled. Long story short, I wound up making a huge mess, with holes drilled way outside acceptable parameters for edge distance, a rectangular opening about 1/4″ off from where it should be, and a generally bad day. So I have to order new parts from Van’s and call it a lesson. Also, the plans say to follow the callouts on drawing OP-27A. I don’t have that one, I have drawing OP-27, which is probably the same thing, but I have to check.

So after setting that aside, I went on to see if I couldn’t screw up the #3 cylinder baffle as well. Lo and behold I did not.

This one clecoed together nicely. IN the above photo, you can see the flange for the cabin heat intake. A little piece of screen goes between this and the baffle to keep the grasshoppers out of your cabin heat muff attached to the exhaust pipes.


Here are the two sections of the #3 baffle in an intermediate state of completion. Notice on the lower right, the cutout looks a lot like a Lycoming valve cover. The two doublers there are where it screws to the cylinder heads. One thing you have to do to get these things to fit right is to trim away the excess gasket squeezing out from under the valve covers.


Another shot of the #3 aft section. You can see the bug screen sandwiched between the flange and the baffle, as well as the tab that mounts to the crankcase. Bit of fun, that. In order to get to this part with a screwdriver, you have to dismount the oil fill tube from the engine. Nothing else will work, not even my miniature ratched screwdriver. That’s fine, I just have to remember to safety-wire the oil tube again before I run the engine.


A test fitting. This is a pain. Install, figure out where the baffle rubs on the crankcase, uninstall, grind down baffle, repeat.


From the back. See how deeply buried that mounting tab is? It’s hard to see, but there’s a piece of black PVC tape covering the hole for the oil fill tube.

I also started messing around with the center mount bracket, which requires a little bit of moving the injector lines around to keep clear. This steadies the middle of the baffle in back and connects both #3 and #4 baffles together at the center.

Next is to continue on with the #1 baffle, whichever one connects to the one I just built, because I can’t do squat on the other side until I get the new parts for #4.

What does “baffled” mean?

3 hours.

Came home from work and tucked into the baffles. This setup is basically a box of aluminum that goes around the engine, forcing the air from the cowling intakes down through the cylinders to cool the engine. It was so nice to get back into metal work, after months and months of wiring, but it wasn’t without difficulty.

The plans have you start on the aft left baffle, which is where the oil cooler mounts. You have to cut a rectangular hole in the aftmost outer piece to accommodate the airflow though the cooler and a doubler that supposedly reinforces it against the stresses of having a big chunk of aluminum bolted to it.

The plans say to mount this doubler 3/8″ inboard of the edge and as high as you can for greater airflow efficiency. 3/8″ is a lie. If you do that, you don’t have enough edge distance between the edge of the hole and the angle of the part that attaches to the #4 cylinder, and that’s bad. So do 5/16″. Unfortunately, I have a couple of exploratory holes in the baffle trying to get this right. It’s a little uglier than I’d like, but I’m not trying to win any beauty contests with the baffles. If everything goes right, you’ll never see them.

This shot shows the baffle on the bench being match-drilled

Looks like I’m going to have to cut away another 1/4″ of metal on the left side there to clear the airflow to the cooler.

Doublers and other little stuff.

4 hours.

Shelley, who is totally awesome, helped me out yesterday by bucking some rivets back in the tailcone. With her help, I was able to rivet the doubler plates for the ELT and marker beacon antennae, as well as install the marker beacon antenna in its permanent home. We then riveted the AHRS bracket along the bottom, which has been hanging in the breeze for weeks now, and after all that, I was able to finish the MKR antenna cable.

I also remounted the EFIS, which was stupid, because I should have taken the opportunity to install the ELT’s remote switch. Now I’ll have to swaddle the EFIS in something to keep metal chips from raining into it when I’m cutting a rectangular hole directly above it. Not a big deal, just annoying.

Finally, I replaced the upper left engine mount bolt. Back when Dave and I hung the engine, I overtorqued the living crap out of it because I hadn’t realized that my torque wrench had already clicked. You can barely feel 15 ft/lbs, and I’d only used that wrench once before, on my Buell, and the torques were way higher. It was pretty easy though. I lifted the whole kaboodle by the engine’s hoist lug, enough to get most of the weight off the wheels, popped the old bolt out, and stuck the new one in. Torqued down to 15 lbs, cotter pinned, done.

Today, I’m off to Michigan, but before that, I get to go to the post office to send my exhaust system to a gentleman in Australia. Hopefully Larry Vetterman sends me my 4-pipe system soon and I can continue the ugly process of firewall forward installation.

OK, just one more thing.

2 hours.

Relabeled antenna wires, applied thread seal to brake fittings (yeah, stupid, I know, shoulda done it back when I installed the brake pedals), and installed sensor manifold fittings. Little things, you know, they add up.

Fuel flow sensor mounted.

3 hours.

I finally found a home for the FloScan sensor. It’s now on the firewall, just below the RDAC, fed by the mechanical pump. This arrangement will let me get a hose around to the throttle body fairly easily. I agonized for months over this stupid thing. Originally, i was going to put it in the cabin, under the tunnel cover or near the bulkhead fitting for at the firewall, but allegedly this is not a good place for it as it tends to read high when the boost pump is on. The current arrangement will keep it relatively free of engine vibration, but downstream of the mechanical pump. The best place to put it is inline between the throttle body and the flow divider, but that’s not going to happen.

I’m also faced with the ugly reality of having to get a new exhaust system. The Vetterman crossover pipes fit just fine, but there’s no room for cables or brackets. I think we discussed this once before. Anyway, the issue here is that the butterfly linkage on the AFP throttle body is way too close to the downpipe of the number 1 cylinder, so close I can’t get a finger between the end of the linkage and the pipe. That’s a non starter, especially if I need to get a heat muff on there, which I will. So it looks like I might have to go with the 4-pipe exhaust, which will sound like a couple of straight-pipe Harleys, but will give me all the clearance I need.

If I’m lucky, I can sell the crossover exhaust on VAF. I haven’t drilled any holes in it for temperature sensors and whatnot, so I might get a few bucks for it.