« Posts under Finishing

Magneto repaired, on to restraint system

6.5 hours.

Within minutes of arriving at the airport this morning, I replaced the distributor block assembly and the distributor gear in my right magneto, the one that’s been sitting on the bench for a couple of weeks.  It was a complete non-event.  I got the new distributor block out of the box, put the timing pin in it, installed the new distributor gear, lined it up, and screwed it down.   Done.

I put it back on the engine, did the buzzbox test again, and got them both lined up dead nuts at 20 degrees BTDC.  Of course, the proof is in the pudding.   I wheeled it outside and fired it up.   It ran just fine, of course.  Equal rpm drop on both mags, and nice smooth running.

The other little issue I need to work on is the prop governor.   I set the arm to what it was when I got it, based on a previous photo.   In that position, it doesn’t cycle the prop all the way to coarse pitch.   Makes sense, the arm can only move about half way, given the cable end’s position on the quadrant.   I’m going to have to drill a hole  another 3/4″ up on the lever arm to get that extra throw.

After the quick runup, I shut everything down and pulled it back into the hangar to put back all the stuff I’d discombobulated during my clownish magneto debugging.   Wires got wrapped, nuts and screws got torqued, and everything went back to being a proper firewall-forward configuration.   This took a bit of time, but it really wasn’t too bad.

One of my goals for today was to work on the seat belts.   Seat belts are pretty important.  They keep you from becoming one with the instrument panel in the event of an impact incident.   Mine are some nice gray Crow 5-point harnesses with a cam-lock release.   Like so:
IMG_1661

Obviously, some adjustments need to be made, but I think they’ll work pretty well with the seats.    The bolt holes in the attach ends are pretty big, so to get them to work with AN4 bolts, you have to fill them with something.   AN960-416 washers work pretty well, but they need some adjustment.   For them to fit into the attach holes, it’s necessary to shave off some of the outer edge material.   This is best done by putting a bunch of them on a bolt, chucking the bolt into a drill press, and running a file along them as they spin.   Then you can press-fit them into the seat belt attach holes (if they don’t just fit), and everything’s cool.   The only thing missing here is the crotch strap,, which I have to take the floor pan out to install.

Magneto Mystery Solved.

7 hours.

So remember when I was trying to debug a nasty popping, backfiring, horrible magneto?  Yeah, like it was yesterday.   Matter of fact, it was yesterday.  And today.  Every engine test since first start has been a mess and the reasons are plentiful, going back to when David and I first tried to get it running a while ago. This has been going on for 3 weekends now.

First, I modified Bob Nuckolls’s electrical system diagram to include a pushbutton starter switch in addition to the spring-loaded (ON/OFF/(MOMENTARY ON) switch.  Turns out you can’t have both.  What wound up happening here is that when the spring-loaded switch was set back to center ON, it was grounding out the one magneto capable of running the engine.  I’ll get to that in a second.  In addition to that, we were never sure which wire went to which magneto, because those two bits of shielded cable never got labeled.   Lesson #1.  We did eventually test that and got the wires running to the correct mags.  We think.

If I wanted to keep my stick pushbutton start, the  On/OFF/On switches would have to go and be replaced with dual-pole ON/ON switches, which would allow me to disengage the start circuit as well as ground the mags, making them cold and safe.   I replaced those switches, and maybe here, maybe the step before, the wires got switched again and left went to right and right went to left.  The good news is that with these switches installed, the engine fired up.  Ran a little rough, but it was a damn sight better than last week.   OK, shut down right mag for RPM drop.  No drop.  Shut down left mag for RPM drop.  Bang, boom, sput, cough.

As you might expect, shutting down the “left” mag caused the engine to pop and misfire, so it was assumed that something was wrong with the right magneto.  First thing we did was switch it out for a good one, the one my hangar mate had in a plastic bag for eventual installation on his RV9.  Timed it to the engine, buzzboxed it, fired the engine up.  Same thing.   At this point it was a head-scratcher, because here we’ve just put a brand new Slick 4300 series magneto on the right side of the engine and we’re still getting popping, misfiring, the same thing.

Oh, one important detail I’ve left out of this story so far:  I don’t know how many times we pulled the magnetos and checked and rechecked the engine timing.  During this process somwhere, I the timing pin (an allen wrench or a pop rivet)  in the distributor block when we pulled the engine through to set up the engine timing.  Maybe I even did it at home before moving to the airport.  At one point, I pulled a very bent allen wrench out of the left mag and a bent pop rivet out of the right one.

I assumed that because the “left” magneto was working fine, it was the right one that was messed up, but that couldn’t be because I’ve just replaced it with a brand stinking new one.   Matter of fact, when I opened up the mag I’d pulled out of the airplane, everything looked fine.  The distributor gears were OK, the rotor was fine, and the distributor block wasn’t cracked or anything.   I left Ron’s spare mag on there  because I had more debugging to do and I didn’t want to change back to the original mag, which may have been compromised in some way, even though none was evident.

Yesterday, I thought, hm, maybe the wire going to the magneto is shorted somewhere.   So I disconnected the terminals from the mag (and took the harness cap off to be safe) and tested them for continuity.   With the switch set to “ON” there should have been no beep from my multimeter.   I got a beep.   AHA!   There’s a short in the shielded P-Lead wire!  So what do i do then? Cut the ends off the wire to the “right” mag at the switch, thinking maybe the connection shorts intermittently because I cut the insulation of the wire and the shield’s touching it.   Still beeped.   OK, that wasn’t it.. Maybe it’s at the mag end.   Cut that off.   Strip back some cable so I can test the ends.   Still beeped.   At that point the day was pretty much over.

Last night I was falling asleep reading Book 7 of Stephen King’s Dark Tower cycle and it hit me.  What if the wires were on the wrong switches?  Left is right, right is left.  That would mean three things:  One, the “short” in the P-lead cable isn’t a short at all.   The other switch was cold, so the multimeter would have beeped no matter what, because disconnecting from the switch and still connected to the other mag, there’s enough continuity for a beep.   At the mag end, testing the wires would produce a beep because they’re going to a switch in the cold/safe position.   Two, this would also mean that I’ve been debugging the wrong magneto for the last two weekends in a row.  All my attention was focused on the wrong part of the system and it didn’t occur to me to check something as simple as wiring because I’d already gone down that rabbit hole and figured I’d verified it multiple times.   Three, I’m an idiot.  Once for leaving the timing pin in the left magneto, twice for not checking the wiring, and three times for assuming things were correct in places where they weren’t.

I hadn’t planned to go to the airport today, but I did.  I figured it would only take me a couple of hours to sort this out, so I loaded up the bike and headed to OXR.   First thing I did was pull the right magneto and check the internal parts for damage.   This was onerous.  I routed my hoses and cables so they trap the magneto in a cage with no hole big enough to let it exit.   I had to take the oil pressure sensor hose off to extract the magneto.  It always makes me nervous doing that.   All I need is for a lock washer to fall down inside the engine accessory case and I’m totally screwed.   I did manage to extract it, and got it up on the bench, where I was able to remove the back cover and the distributor block.   Guess what I found:

IMG_1651

That right there is the rotor gear.  This spins on the shaft that opens and closes the points, making the spark.  Notice that there are two teeth missing, and several of the others are damaged.   The bottom line here is that no matter how carefully the engine timing is done, there is no way in hell this gear will drive the distributor gear in any way that will provide a spark at the right time.  To prove this out, I reassembled and installed the old right mag on the left side of the engine.   I have two impulse-coupled mags, I can do this.   I remembered to take the timing pin out, say thankya and may it do ya fine (Dark Tower, remember?).   Then, miracle of miracles happened.   The buzzbox timing process, which I am now intimately familiar with, went just like all the documentation, descriptions, and YouTube videos said it would.  Snap the impulse couplers, back off enough to get rid of gear lash, then move the prop forward to 20 degrees BTDC.  twist one mag until the light just goes on or off, depending on what it’s doing when you turn the box on.   Back the prop off again, then move it back to 20.  The light should go on right there.   Twist the other mag until the same thing happens.   The trick is to get both lights to come on at the same exact time.

With two teeth missing off the rotor gear that wasn’t ever going to happen either, so wiggling the mag back and forth on the dead spot betwene those teeth isn’t going to do squat.

But joy of joys, sing hosannah to the heavens, with two properly timed and synchronized magnetos, that engine runs smooth and strong, like a big cat purring.   Ron helped me push the ship out into the sun and I fired it up.  Rock solid, dead on.  RPM drop on both mags, just like that beat-up Cherokee I learned on.

Now I get to go back in and clean up the mess I made testing everything.  Re-wrap my wires, safety-wire the governor, everything back int its place.

RV-7 Checkout Complete

11.5 hours.

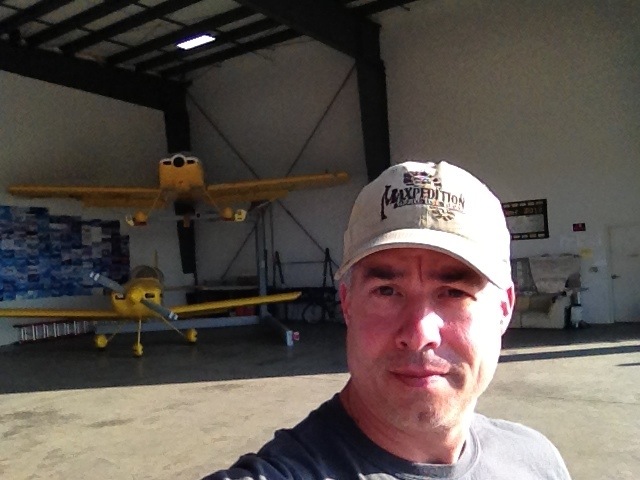
Success.   I got my checkout in the RV7.   This is less a testament to my skill as a pilot than to Mike Seager’s skill and patience as an instructor.   We did have some interesting days.   Departure from 05S was IFR on Friday and Saturday.   We shot the localizer approach to Scappoose (KSPB) and got in under the ceiling so we could do pattern work.

My last post was done on an iPhone, so it’s a bit sparse on details, but this is the meat of it:

Pattern work in the RV7, with my current pilot skills and experience, was an intense, sometimes terrifying experience.   My repertoire of flying machines consists of a few Cherokee variants, a C172, a C152, and recently, a 115hp Citabria.   The pace of flying the Pipers and Cessnas in the pattern is a relaxed, almost languid affair, with plenty of time between procedures to really settle in.   The Citabria less so, because we always do power-off approaches.   Not so at all with the RV.    That was like being a short-order cook in the busiest diner in town.  Stuff happens FAST.

The takeoff, which I sucked at in the beginning, is some work.  The left-turning tendencies of the RV 7 are pretty intense.    The Citabria only has 115hp, so the torque, P-factor, and rotating slipstream aren’t as bad.  They’re there, but it doesn’t take much to correct them out.  Gyroscopic precession is less, because the Citabria’s prop weighs less.

But the RV is tricksy.  To get that thing off the ground in anything resembling a straight line, it requires a lot of right boot.   As soon as you light up the throttle, it wants to head for the bushes, and you better be on top of it or you’re going to have problems.  At the same time it wants a lot of right boot, it wants really small corrections.   It’s really easy to get a left-right PIO going while you’re hunting for the centerline, and as soon as you get that together, the tail comes up and it wants to wiggle again.  Then the bad habits take over, like pushing the stick to the right, thinking that’ll fix everything.

It won’t.

In fact, the adverse yaw will make it turn left even more, so you’ll compensate for that with more right rudder.   By that time, the plane is already headed for the weeds, and it’s nearly ready to fly; in fact, it’s been ready to fly for a while, but you didn’t get the memo because you were still trying to figure out what magic farking combination of control inputs will put this bucking bronco back on the straight and narrow.  You wind up crow-hopping across the runway slightly sideways, waggling into the air, one wing low.   To the casual observer, the overall effect is that of a pelican who has recently gulped down a beak full of absinthe.

Assuming you get it into the air, and you will, because Mike won’t let you do anything truly horrible, you must now manage your climb.   Check engine instruments, pitch to 110mph, MAP to 25″, RPM to 2500.  What’s that?   You never used a constant speed prop before?  Oh boy are YOU in for  a treat.   Never used an EFIS/EIS in flight before?  This is going to be fun.   Actually, it’s not that bad.  The only thing that made me nervous was how much time I was spending inside the cockpit squinting at the tiny numbers for MAP and RPM.  I like knowing my RPM by the sound of the engine, because that leaves my eyes free to get my sight picture, but that can only come from practice and familiarity with the airplane.

Once you’ve established climb, pull the power back to 2500RPM, then just twist the prop control CCW until you hear the engine sound change.   Chances are, you’ll be close enough to 2500 rpm to count.

At 700′ you turn crosswind.   Our traffic was right closed, so it required more right rudder than if we’d gone the other way, where you can be lazy and let all the left-turning forces do a bunch of your work for you.   Here you need to do a couple of things, possibly simultaneously.   At 900′, start leveling off, dial power back to 16″ and set the prop RPM to 2300RPM.  Again, just listen for it.   It might take a few extra twists.  Oh, and while this is going on, you may or may not be turning.   It’s assumed you can turn and manage your altitude at the same time.   This is not easy at first, but it becomes less difficult with practice.

Pattern altitude at KSPB is 1000 feet.  16″/2300RPM should keep you there nicely, burbling along at a stately 120mph.  At this point, you’re almost in Piper/Cessna territory.   The downwind turn should happen wherever it’s supposed to, which means you should be far enough in the crosswind direction to turn and put your right wingtip on the runway.  You might still be climbing.  You might not.  It’s that whole walking-and-chewing-gum-at-the-same-time thing.

Once you’re leveled off at 1000′ and on the downwind leg, it’s time for downwind checks.   Fuel to fullest tank, carb heat hot, (mine’s fuel-injected, I won’t be doing that), boost pump on.   Make sure we’ve got good readings on the EIS for oil and fuel pressures, and temperatures.   If you’ve done this right, and you don’t spend a lot of time hunting for power and trim settings, you might, just might, have a little breathing space before you need to set up your approach to landing.

Approach is set up on the downwind leg, abeam the instrument landing marks.   Those would be the two big white stripes just after the numbers on the runway.   This is where it gets interesting, because you now have to change a bunch of things inside the cockpit without changing the attitude of the airplane.   Here, you throttle all the way back to idle, keeping the nose up, because what you want to do here is slow down enough so you can use your flaps.  This is also when you push the prop control back against the wall, because your engine management will now be based on RPMs instead of Manifold Air Pressure.    Vfe is 100mph in the RV7, so as soon as it slows down below that, you can drop the flaps to half.   Using the standard Van’s flap motor, that’s roughly a 4-count.   Not 1-Mississippi, but one, two, three, four.   When you’ve slowed down to 85mph, push the throttle back up to 1800RPM.   If you’re going 85mph and your RPM is 1800, you should be descending at 500′ per minute.   85mph is the best glide speed for the RV7 and should put you right in the pocket for a landing, assuming you get the next part right.

When you’re at a 45 degree angle from the end of the runway, turn base.   On the base leg, drop your flaps to full.   If you don’t, you’ll blow the approach, and you’ll come in too fast, too high, too low, or too slow, maybe some combination thereof.   It will take a few runs at it, but if you forget the second notch of flaps, it will feel weird.  Pitch will be wrong, speed will be wrong, and if you’re lucky, you’ll be able to figure out what’s making the approach feel weird before it’s too late to do anything about it and you have to go around.   One thing I learned is that a good approach goes a long way towards a good landing, and even though it took me most of 3.5 days to figure this out (having had it explained to me repeatedly by a very patient flight instructor), I can attest to the veracity of this concept.     A good approach also means you don’t have to run the throttle all over the place to maintain your desired angle.  Yes, pitch to speed, power to altitude and all that, but the desired outcome here is a smooth transition from being aloft to not being aloft and if your approach is good, you won’t be hunting for the right glide path.

And then there’s the landing.   The RV7, with its stubby, Hershey-bar wing, has a steeper glide than the C172 or the Cherokee, and the constant speed prop acts like a brake as well.   This is why you might want to carry some power across the threshold.   Why?   I’ll get to that in a second.

I think we can all agree that landing the aircraft is one of the most important tasks a pilot must perform.   When I started with Mike, the thing I was doing to get the plane onto the ground could only be called “landing” in the most generous terms possible.   I’ve gotten half decent at landing Mickey’s Citabria.   matter of fact, I think I could go out there and pull off 5 out of 5 right now with no go-arounds.    I thought that when I started with Mike on Wednesday.

Well, the RV ain’t no Citabria.  There is a tiny window in which you can transition from gliding descent to leveling off into ground effect, and if you blow it, you’re going to drive it into the runway and bounce off the main wheels.  That’s if you don’t hit so hard you spread the gear out and strike the prop.   Of course, the fear of this very situation will cause you to land on an imaginary runway that’s 20 feet in the air.   You need to get low and level off.  Low.  Like, lower-than-snake-shit low.

Once you’ve made the runway, you cut power to idle, but don’t let the nose drop.   Don’t yank it up like the head of the old nag you rode to town on either.   Pull it up level.   Maybe you leveled off too high.  Very very small corrections, lower the nose a bit, then level off again.  Get down there.   If you carried some power and a little extra speed over the threshold, you have some time to make these corrections.   “Some time” means you have one or two opportunities to fix what’s broken, and that’s not a lot of time at all.   if you touch the front wheels first, you’ll bounce, the classic tailwheel balloon.  if you flare too early, you’ll balloon back into the air and slow down.   You can fix this by lowering the nose a little, and if you’re carrying speed, you can save it.  If not, it slows down too much, then it just stalls 10 feet in the air and drops to the runway like a sack of skulls.

The other thing that makes this interesting is that the stall attitude is actually higher than what it’s at sitting on all 3 wheels.   This means you can’t see over the nose when you flare for landing.   You shouldn’t be doing that anyway.  You should be hanging your head out to the left and finding a spot way down at the end of the runway so you can judge how high you are.   I picked up the bad habit of looking over the nose, because in the Citabria, I can see over the nose when it’s in stall attitude.   Once I figured out how to look down the left side of the cowl for my reference point, my “landings” became landings, with no quotes.   They’re still not greasers, but they’re safe enough at this point, but like Mike says, don’t be satisfied with “good enough.”  Always do better.

Oh, and for all you noob pilots out there, I highly recommend William K Kershner’s excellent book, The Student Pilot’s Flight Manual.  Mike sent me home with it during my stay there, and I’m truly converted.   I got more out of that than any other flying text I’ve seen.  It’s also fun to read and the illustrations are clear and instructional.

I want to say a huge thanks to Mike Seager for three of the most challenging and rewarding days of my thin flying career, and for teaching me several new ways to look a the tasks of flying.

Flight Training

Yesterday began the actual odyssey of flight with the RV-7. Mike Seager has been teaching transition to the RV series for a long time and I’m the current beneficiary of his skill and knowledge.

I’m currently learning in his plane:

20131024-194442.jpg

We cleared ourselves to take off through the fog (you can do this at uncontrolled airports, apparently) then punched out and headed for Hillsboro.

I thought after flying the Citabria for a while, I’d have this nailed, but no, not even close. The RV with constant speed prop is a completely different animal. There’s a lot to do very quickly: it’s very easy to get behind this airplane, especially with the added workload of the constant speed prop and the fact that it climbs like a rocket.

20131024-195220.jpg

The EFIS is another twist. Mine is different and I kept relying on the steam gauges rather than the display. So pitch/power/trim/heading was a handful and I’m less than satisfied with my performance in that regard.

Ground ops are different from the Citabria as well. Way more emphasis is placed on differential braking than rudder control and feet come off the floor for braking, which I’m not used to. Mike has you brake instead of eating up a load of runway on landing.

Speaking o which, I need work on landings. One thing different about this plane is that I can’t see over the nose in stall attitude. I can in the Citabria, so that’s given me the bad habit of trying with the RV. It doesn’t work.

On the plus side, we took a little side trip to the Van’s Aircraft factory in Aurora. The Mothership!

20131024-202747.jpg

20131024-202756.jpg

20131024-202810.jpg

Then we went back to Vernonia for debrief. More tomorrow.

More Magneto woes.

6 hours.

At this point, I’m out of ideas. I unshipped the right mag and took the rear cover off to inspect the rotor housing and gears. Even though I left a pop rivet in the timing hole and turned the prop, the distributor gear seems fine. I followed the procedure in the repair manual, and timed the distributor gear using the marks on the rotor and the gear itself, then reassembled everything and put it back on the engine. Same result, no joy on right mag. So, bad magneto, right?

Wrong. This is where it gets truly odd. Ron loaned me the new impulse coupled mag he has for his project. I timed it with the pin, put the engine at 25 BTDC and put it on. Timed it with the buzz box, and tried firing it up. Exact same result.

I now have no idea what is going on.

It’ll have to wait two weeks until I get back from training with Mike Seager in Oregon, which is in two days.

It moves under its own steam!

Ron shot this video yesterday of me going around the block in 313TD.   It moves, it turns, it brakes.

[Untitled]

5 hours.

Today was about putting things back together and getting a handle on some of the chaos.   The first bit of good news is that the oil temperature probe works fine.  I pulled it out of the engine and hit it with a heat gun and sure enough, it gave me a reading.  So I’m not going to worry about that anymore.   I secured the wires back in their bundle and i’m calling that squawk done.

I also wasn’t real happy about the weird way I had the fuel pressure sensor set up.  The Adel clamp holding it was maybe a size bigger than it should have been, and this way seems more secure:

IMG_1572

As I mentioned last time, I flipped the governor arm over and it seems to work just fine:

IMG_1570

My biggest problem with doing it this way was where the injector line was going to go.   A piece of angle solved that.   Now it’s out of the way, and less likely to be heat-soaked down near the cylinder.  I still haven’t safety-wired the screws yet, or put the cotter pin in the cable attach nut, But I think this is how it’ll stay.

Last week, Owen recommended tightening up the tailwheel chains.   Van’s recommends a half an inch of slack, but if you ask ten different people how they like their tailwheel chains, and you’ll get at least five different answers. But my chains had an inch of slack, and if I took a link out, I’d have none.  But I did take a link out of each side, and while there isn’t really any dangling slack, I can move the chains up and down by about a half an inch, and I’ll tell you, based on today’s test, it taxis just fine:

IMG_1571

That little gap in the rudder fairing is kind of annoying.   Not exactly sure what to do there, except put nutplates in there and hope for the best.

Today’s test was all about seeing how things went with the cowl on.  First, I wanted to make sure I could actually get the cowl on with the flipped-over governor bracket making the cable rise a bit more than it did before.   Turns out, I’ve got about 1/8″ of clearance between the cable and the top cowl, which is good enough.   And from what I remember, the cowl inflates a little in flight, so that 1/8″ becomes a little more.   And that’s fine.   I just don’t want to have to put a clearance wart in the cowl to accommodate the cable.

IMG_1573

But before taking it out for another test, this adjustment had to be made to the baffle material on the lower cowl.  I had to cut it back a bit, because it was covering up about 6 square inches of air intake.   Bad.   So with this mod in place, I put the top cowl on, and pinned it down.   Then I put a few of the floor panels in, and you’d be surprised how much the plane stiffens up with the reinforcing action of the panels.   I ran it up, then shut down the left mag.  Engine died.   Started it again, repeated.   OK, right mag dead.   Grr.   Still runs fine on one though.

So I said screw it, let’s taxi it around.  The new tailwheel chain tension was much better.  Now it’s more like Mickey’s Citabria, and the ground handling is nice!  I took it to the end of the hangar row, turned right, went down the next row, turned right again, then went back to the barn.  CHT’s never got above 210.   As soon as I get this mag situation sorted out, it’s time for ground runs.

\Last time, shutting off the left Mag made a lot of popping and missing, which I attributed to timing.   This time, I’m pretty sure the timing’s right, but now shutting off the right mag shuts off the engine.  Now, it might have something to do with the fact that I left the pop-rivet I was using for a timing pin in the hole when I pulled the prop through, but I can’t say for sure.   What I do know is that before, on the right mag, I had backfiring.   Now I’ve got squat.


Magnetos timed (again) and RPM sensor fixed.

6 hours.

One of the day’s tasks was to replace the magneto gasket we tore with a new one.   This necessitated removing the right magneto, the one that was cranky about timing.   This is also the mag that has the hinky contact spring on one of the harness wires.  I figured what the hell, I’ll make sure both are timed, so I’ll pull both, put new gaskets on both, and set the timing again.   Big mistake.   Timing mags with two people sucks, as you might have gathered from an earlier post.   Doing it on your own sucks too, and then some.   Yesterday it was hot and windy at OXR, so the hangar was warm and the doors were rattling and making freakish noises every couple of minutes.

There are various sources of knowledge as to how to time mags, but the general idea is that you turn the engine over until the crankshaft is at 25 degrees before top dead center.   Then you zero the mag position by sticking a pin in the timing hole in the back of the magneto where it will sink into another timing hole on the gear inside, thus locking the thing into the position where the points are open.  Then you stick the mags back on your timed engine.

A number of factors are at work here.   There’s the impulse couplers, there’s the slop in the mags even with the timing pin inserted, there’s gear lash in the engine itself, and there’s the ambiguity of where 25 degrees BTDC actually is.   Near as I could figure out, there’s a little lump in the rotation of the mag gearshaft where the points open.   This is no great mystery.   A cam inside opens and closes the points to make a spark.  That fires the spark plugs.  This is no different from your common Briggs and Stratton-powered suburban lawnmower.

But the magnetos are buried amongst wiring, hoses, and engine mount tubes, and getting them back on can be extremely frustrating.  The mag gasket is a little wider than the magneto housing, so it’s really easy to dislodge it.   The engine gears of the mags are also wet with engine oil, so they’re slippery.   It’s also of primary, critical importance that nothing falls down the open mag hole into the accessory case.   If that happens, game over.  If that happens, you better hope whatever fell, like a nut or a washer, falls all the way through into the oil sump where it gets stuck to a magnetic plug — if you have one.  The obstacles in the way make it easier, but not by much, to insert the timing pin into the housing with the mags more or less in place, but supporting them, spinning the gear, and inserting the pin is one of the more frustrating solo tasks there are.  The trick is to get both mags installed so they’re within just a few degrees of each other, because there’s only about 70 degrees of twist available to bring them into line.    If they’re too far off, they’ll never sync up.

The next part is relatively easy, assuming the first part goes OK.   This is where the buzz box comes in. This thing has two lights on it, and you connect the leads to the P-lead connections on the mags.  When the points are closed, the lights are on.  When the points are open, the lights are off.   Or vice versa.   Can’t remember.   The point is, the status of those lights is supposed to change when the engine turns through the specified timing mark on the flywheel.   Both mags are supposed to change at the same time.    There’s actually enough wiggle room with the timing pins in the magnetos to put the timing off by a whole gear tooth.  If it’s off in opposite directions on each mag, there might not be enough range to bring them both back into line at the right point.     But eventually, I got it.   The trick is pulling the prop backwards a bit, then advancing to see the lights go.   The prop has to be pulled backwards enough so that going forwards takes out the gear lash well before the points open, otherwise the adjustments are crap.   But you don’t want to go so far back that you catch the impulse couplers again.    Maybe this isn’t the proper way to do it, but this worked for me.  Also of important note: pull the timing pin out of the magneto before cranking the engine around.   If you don’t, best case is you’ll bend your timing pin like a wet noodle.  Worst case is you damage the innards of the mag.

So I got them as close as I possibly could.    Then I put the shielded ground wires back on.   For safety, the shielded wires go back on the P-lead and ground before the distributor caps go on, because until they’re on and grounded, the mag is hot, and if a spark is triggered, it could swing the prop and really ruin your day, especially if you or your stuff is in the prop arc.   Imagine that.  The prop kicks and sends a blade into the tank of your air compressor or a nearby tool cart.   Prop strike!   Have fun tearing down that engine, sunshine.

By the time this process was over, I was already well past my scheduled time to head back to Los Angeles.   But if you’ll remember, this exercise was only part of the day’s activities.   The other things I needed to attend to were the RPM sensor and the oil temperature probe.   Earlier in the week, Matt at MGL responded to my email and said I needed to remove the ballast jumper on the RDAC and that I could delete the resistor between 12v power and sensor signal.   I pulled the ballast jumper, then proceeded to push the ship out into the wind for a quick test.    Ron and Melody helped me push out and get pointed into the Santa Ana wind.   With the wheels chocked, I fired it up, once again.

IMG_1556

It lit right up, after Owen reminded me that I needed to run my boost pump for a second to get some fuel pressure on startup.   It ran strong and smooth, and I had an RPM reading this time, but like a monkey, I forgot to test each mag individually.  But here’s another ground run video:

This time, however, was another milestone.   We pulled the chocks and I actually taxied down to the end of the hangar row, then back.   At that point, my EGT’s were starting to get a little high, so I thought I’d quit while I was ahead.  We pushed it back into the barn and I went home.

Working on engine-start squawks.

7 hours.

Last week’s engine start, while exciting, wasn’t without issues.   The one I thought was going to be most difficult to fix turned out not to be.   The governor operation was reversed, and the fix turned out to be pretty simple.   I just flipped the governor bracket over and mounted it so the cable operates the arm from below.     All I had to do was put a small piece of angle on the side of the arm to secure the #2 fuel injector line.   We’ll have to see about conflict with the cowl.  I put the top cowl on and it looks like there might be about 1/8″ of clearance between the new governor cable arc and the underside of the cowl.  That’s not a huge deal though, and I’d rather put a blister on there than go through the hassle of dismounting the governor and sending it back to American Propeller to see if maybe, just maybe, they can reverse the operation.   Either way, that would cost me in time, in shipping, in ability to test the engine in other ways and debug the two sensor squawks from last time.   The hardest part was the firewall-penetration eyeball.  It’s almost impossible to get to and I still need to torque it down, because it’s not laying flat like it’s supposed to.  I had to take it out so I could get the extra half inch of cable slack necessary for the flipped bracket.

On the others, I had no luck.   No RPM reading, no oil temperature reading, although I have no idea how long it takes the oil to warm up to a minimum of 72 degrees.    The rpm thing is a little scarier because i don’t know if it’s the wiring, the sensor, or the magneto the sensor is attached to.   I’m going to have to break down the wiring of those two pieces and go through it piece by piece.   I really hope the senders aren’t bad, because those things are not cheap.  Replacing both is about a taildragger lesson’s worth.

Speaking of which, I have replaced the ON/ON/(ON) magneto switches with ON/ON DPST  switches.   One side of the switch handles the start circuit and the other handles  the mags.   When the start circuit is enabled, the magnetos are ungrounded.   Since I have two impulse-coupled mags, I can get away with this.   At this point, the starter button on the stick is the only way to kick the engine over now, which is OK, but I plan to install a pushbutton to forcibly engage the starter should the relay the stick button actuates takes a dive.

The magneto timing still needs work.  Even after the switch replacement, the right magneto still makes the engine backfire like mad when it’s on its own.   I’ll need to retime it anyway when I install the new gaskets, but it’s still a royal pain and I’m not keen on doing too many more runs with it in that condition.

Oh, and joy of joys, there’s a small crack in my canopy, in the aft right corner, coming up from the last screw hole on the canopy frame.   I didn’t catch it until now, because it has been  covered with masking tape, which I removed yesterday.   I removed all the protective plastic from the canopy, except for a swatch between the rear canopy and the roll bar brace.   Now the fun is going to be getting that last piece of plastic out from there.  I’ll probably have to dismount the rear canopy, which I would have had to do anyway to get some kind of seal in there.

Engine Start, Part 2.

  1. 5 hours.

Armed with last weekend’s knowledge and suspicion, David and I headed up to OXR to debug and correct the mag and start wiring, then actually start the engine.    We had a copy of The AeroElectric Connection and more importantly, the airport gate card, which allowed us to come and go as we pleased.

Even though we knew what was wrong, it was puzzling, because we were trying to follow Bob’s diagram and make an open circuit for one thing while making a closed circuit for another.   Maddening.

Eventually, we did figure it out and we were rewarded with the sound of an airplane coming to life.

Hooray! Huge milestone, and only three squawks:

  1. No RPM reading.   This is most likely a bad ground or a severed wire coming from the pickup on the magneto.
  2. No Oil Temperature reading.   Maybe this shares a ground with the tach sensor.
  3. (and this is a big one)  Governor operation reversed.   The prop does cycle and the governor doesn’t leak, but it operates the wrong way.   I need to set it up so the prop increases pitch when I pull the blue lever back.

No leaks, no fires, no pieces flying off.   I’d call it a good day!