« Posts under Fuselage

Strapped.

1.5 hours.

I got my crotch strap kit from Van’s today. This allows you to put the 5th poin of a 5 point harness in below the seat pan. Kits shipped after 08 had them included but I only figured out I needed it last weekend.

20130502-220338.jpg

These go between the seat ribs exactly where I stuffed a big wiring bundle, so some trimming was necessary. The left side is drilled and deburred, and I’ll rivet it in tomorrow.

Ready to move!

12 hours.

That’s right, yesterday and today, twelve hours. Putting on and taking off those covers is time-consuming, and along the way I discovered a bunch of little tasks I’d blown off until later. Well, later is now. So as I went along, I remade the right side fuel line so it fits better with the cover panel, I moved the Adel clamp on the return line under the tunnel cover, and I dressed the antenna cables on the left side. I’ll need to do the left fuel line as well, I think, but I have something there that works.

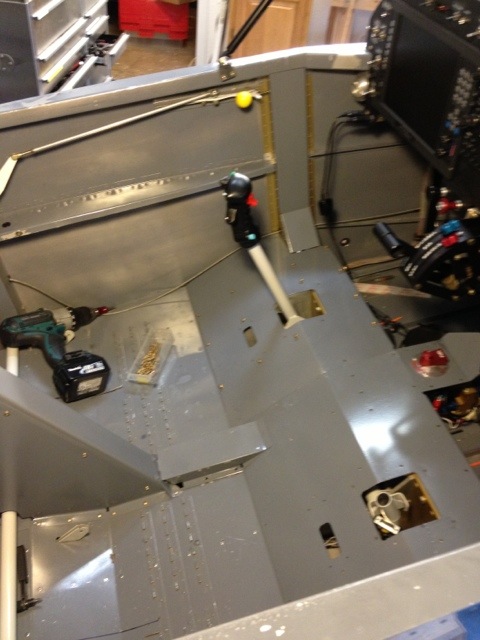
Mostly I wanted to get everything bolted, screwed, taped, and riveted onto the airplane that I could, to facilitate transportation to the hangar. There are about million things I’m going to have to box up and move or otherwise account for. If it’s on the airplane, installed where it’s supposed to go, I don’t have to worry about finding it later. A good part of that activity was installing the interior. Last night when I quit, I realized I’d have to install a lot of little Velcro hook disks to hold the carpet backing.. The instructions say you can rivet them to the floor panel or you can drill the holes out to 5/32 and use existing floor panel screws to attach them. I took the easy way out and drilled them out to 5/32.

20130428-163459.jpg

As you can see, there are a lot of screws.

20130428-163528.jpg

I didn’t take a lot of pictures of me installing all the Velcro. That’s boring. This is a shot of the Classic Aero Designs interior, installed, with carpeting, side panels, seats, the whole works. Now it looks almost like a real airplane!

20130428-163555.jpg

Another view. This thing is now much more fun to sit in and make airplane noises.

20130428-163715.jpg

This is the baggage compartment, looking aft between the seats. Putting the ‘mental’ in ‘experimental.’

20130428-163729.jpg
Cowling on, canopy on, all skins done, ready for the move to OXR.

There are a few squawks I need to take care of:

1: Fuel pump overflow tube (yes, I still haven’t gotten to that)
2: Anti-chafe for the cabin heat tubing, like UHMW tape
3: End hardware for canopy side hinge pins.
4: Order 5-point restraint system
5: RTV around baffles, baffle-engine case interface, blast tube fittings

And eventually, I’ll get all the posting options right.

Testing my posting options so you get a little more info instead of a spammy clickbait-looking thing.

More interior assembly

2 hours.

I suppose I can have confidence in the fact that since it’s so difficult to put together, it shouldn’t come apart that easily.

Putting in more covers with their untold hundreds of screws in preparation for carpeting.

Cover panels

1 hours.

20130424-085711.jpg

20130424-085730.jpg

Putting all the covers on for the rest of the interior install and prep for the move.

Skin and canopy on!

2 hours.

I managed to get home for an hour yesterday from work (yes, still working the occasional weekend) and Dave came over to help me finish riveting the top skin. We got that done, and today, I think I blew my back out trying to get the canopy back on. It wouldn’t slide into the blocks, no matter what, and I couldn’t figure out why. That’s when I had one of those dark moments and issued forth curses and bile.


This is the MGL IO eXtender. It is placed on the subpanel between the instrument panel and the firewall. It is also directly in the path of the canopy frame. In retrospect, I probably should have marked out the 1 3/4″ zone in which nothing should be placed. But I didn’t. At this point, I’m like, whatever. I can move that. I think. Actually, not really. Not too many other places I can put that thing without some rewiring and I wanted the canopy on TODAY. So I came up with this:


Originally, I had a backing plate on the IOX because of the way the mounting tabs worked. Since this thing weighs basically nothing, I’m pretty confident that the arrangement here will be just fine. Now the canopy frame clears.

All that aside, I will be paying dearly for the amount of crouching and wrestling I had to do to get the canopy back on the aircraft. It’s not terribly heavy, but it’s awkward, and fragile, and it took quite a bit of work to get it into place with the hinge pin holes lined up. But it’s now on. When I get back from Seattle, I’ll put the struts back on, and then it’s hurry up and wait for some hangar space.

More skinning.

3 hours.

Dave came over to help me for a bit, and we riveted half the top forward skin on. He had to go and I picked it up after lunch. I managed to get all but the last row, the row along the longeron, and I’ll need some help for that, since it’s inside the plane and I can’t reach it no matter what I try. But it’s almost ready to have the canopy put back on, which is truly exciting.

The Skinner

3 hours.

And yes, it’s a shout out to Neal Asher, whose writing has gotten me through a tough couple of months. When you’re having horrible-seeming things happen to you, reading about truly horrible things happening to somebody else and the truly horrible people who cause them getting their comeuppance is very therapeutic.

As far as this aircraft project goes, yesterday was not horrible. I actually might have the temerity to call the firewall-forward process almost done. The only two things missing from the equation is a 2″ hose clamp for the cabin heat SCAT tubing (which is actually missing, I can’t find it right now) and the manifold pressure sensor fitting and tubing, both on order from McMaster-Carr. I can look at the engine installation and say with fairly high confidence, yes, this engine will turn the propeller repeatedly. Today I’ll go through my periodic shop purge/clean ritual and see if the clamp turns up.

I also took a long look at all the stuff just behind the firewall and ahead of the subpanel, to make damned sure there was nothing else I needed to put there, because as I’ve mentioned before, once you rivet that top skin on, you can’t get to anything below it without a flashlight, a mirror, and possibly tentacles. Satisfied to the limits of my ability with such things, I began riveting the top deck skin on. This is hard. This is hard because you have to have a rivet gun on one side and a bucking bar on the other, separated by a 3-foot sheet of metal and ‘awkward’ only begins to describe the process. There are two holes in the subpanel support capable of taking my hand holding a bucking bar through them, and it’s a little like the reverse of a monkey trap. There is much maneuvering into position, then there is riveting, whilst holding the bucking bar perpendicular to the rivet without being able to see it. This process enabled me to do the center row of rivets, and the canopy hinge support bracket, but failed on the outboard subpanel support rivets because to get my hand into the right position, I had to bend the skin away from the surface it was being riveted to, causing a gap. I couldn’t get the leverage I needed and the skin ‘pillowed’ on the support rib. Bah. Curses. Foiled. I’ll need to enlist a helper for this step, but as soon as it’s done, I can put the canopy back on and officially list the project as ‘more parts assembled than not.’

Department of the Interior.

7 hours.

Yesterday saw some finishing up of little things firewall forward and I got started on the interior. When I say “started,” I mean started messing things up. I drilled the stiffeners to the center section (why I didn’t do this before I have no idea) and began riveting them on. I got through the majority of my LP4-3 rivets when I realized I hadn’t yet deburred the center section holes. Jackass. So I drilled off the rivets and started deburring holes. I did remember to deburr the stiffeners, so there’s that. Today I tacked on the stiffeners and ordered more LP4-3 rivets. After that, I did some cleanup. With the shop and the ship cleaned out, I figured I could work on the other interior parts that I got from Classic Aero.

The only thing I was worried about was the seat hinges, but the instructions were very clear and well written, or would have been if they were all there. The “see separate instructions for rivnut installation” part just didn’t materialize anywhere in any of the boxes, but after a bit of fumbling, I figured it out.

I got the side panels set up, then the left seat measured for center, drilled, and riveted. Easy. I’ll do the other seat tomorrow or Tuesday. We’re about to start demolition on the downstairs remodel, so who knows when I’ll get back into it.

But the interior is actually a pretty sweat-free affair. Big velcro strips hold the panels to the metal, so all I have to do is stick them on when it’s ready to rock.

Cabin heat done.

6 hours.

I spent a little bit of time installing a little air conditioner in the window, the one we’d previously taken out of the guest house bedroom and put in the dining room window while Shelley makes a wedding dress for a friend of ours.

Putting it in the shop window was brilliant… Nice and cool and comfy, in what passes for a heat wave here near the L.A. beaches.

Once that was done I worked on the alternate air for the snorkel. They have you glopping up the interface between the galvanized steel opening hardware and the fiberglass snorkel with a mix of flox and resin. I guess this makes sense, but it seems kind of half-assed. Once that cures, I can sand it smooth and call it done. The snorkel won’t be done-done until I get the air filter opening pro-sealed in, but then it’s another thing I don’t have to worry about again.

With the goop on the snorkel setting up, I wanted an easy win, so I worked on the cabin heat cable. The plans for this thing aren’t real clear about how you’re supposed to route the cable through the cabin, but I worked it out. The knob sits to the right of the throttle quadrant, so the passenger can easily get at it. I also wanted to do this so I’d have an inkling of what I’d be looking at when installing the alt air cable, which is another Bowden-type cable like the cabin heat. This type of cable is similar to a bicycle brake cable, or if you’re old enough to remember, a choke cable.

Mostly a non-issue. Cabin heat door opens and closes with push-pull. Sounds done to me.